

AIR TRACTOR DOOR INSTALLATION
Remove old door and hardware, (rubber bumpers, latch assembly, GPS light bar). Hinge at screw attach and any extra clamps fore and aft. Cut out hopper top to template size provided. Make sure template is centered on hopper top and back edge of template is on front edge of old doorway on cockpit end.

Pre-fit new door frame to insure proper fit by inserting new door frame inside hopper and clamping in place. This may take as many as 20 vise grip C-clamps. Each hopper is different, some fine tuning may be necessary. Once desired fit is achieved, prepare inside of hopper by sanding or grinding 5" all the way around the cut out area. In vent bubble area of hopper only sand or grind 3".
Wet out matting provided on door frame. Make sure wet out process is not runny wet, (a little dryness is ok) Resin will eventually wet matting. Resin mixture: 1 pt resin, 25 to 35 milliliters catalyst @ 60 degrees F.; adjust to volume or temp as needed.
Install frame with wet out glass inside hopper and clamp in place with vise grip C-clamps, setting clamps for a snug fit, adjust new frame so you have a good fit. You may have to re adjust clamps to desired fit because no two hoppers are exactly the same. Let set at least 8 hrs before proceeding to next step. Clean up any resin runs at this time before resin sets up.
Remove clamps, clean up any slag on inside, use provided paste to paste up inside transition area so transition is smoother. Paste must be catalyzed 15 milliliter per hard ball size. Lay up glass provided over new frame and transition area, making sure glass is void free. Let set up at least 4 hours. While this is setting up, transition from hopper to new door frame can be ground or sanded to provide smoother transition, any voids left can be pasted in. Let set up at least 4 hours.


De-burr inside glass and outside paste with 80 grit sand paper. Coat with resin (resin must be catalyzed also) and add wax (provided, 10 mil per qt.). Coat area thoroughly and this will seal up area to stop chemical contamination. Let set until dry.
Set door in place and weigh down with about 100 to 150lbs. This is very important to ensure a proper seal.
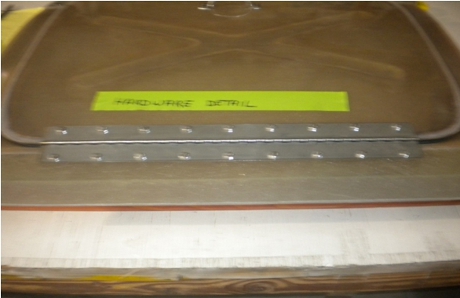
Center hinge on door, center pin of hinge should be directly over gap of new door and new frame, drill ¼" hole putting bolt in hole each time to ensure proper alignment. When all holes have been drilled, bolt hinge to door and hopper sealing each hole with a little silicone.
Install rubber bumpers, handle, and data plate in location you desire. You can use your old door as a template for location. Large door installation will require hardware to be centered. Location of rubber bumpers will probably need to be re-located on large door. Seal all bolt holes with a little silicone. (Old hardware holes can either be glassed or sealed up with a bolt which ever you desire.)
Hopper Latch Assembly: Large or small door center assembly with latch in open position set edge of foot on latch assembly on inside edge of new door frame, clamp to hold in place. Drill 6 3/16" holes in top, set with #10 screws sealing each one with a little silicone in each hole.
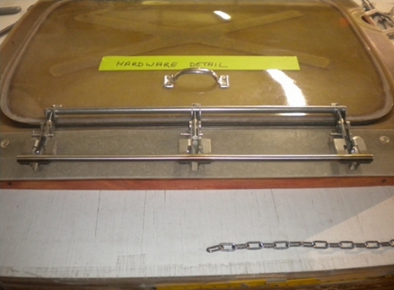
Door Latch Assembly: Your will have to relocate 3 holes on hook assembly on door. Drill 3 3/16"holes in hook assembly centered between old holes. Foot should be set with ¼" past edge of door, GPS light bar may need to be relocated further towards firewall. Set with #10 screws and seal each one as before, installation is now complete; adjust tension on latch assembly by lengthening or shortening tensioning rods.
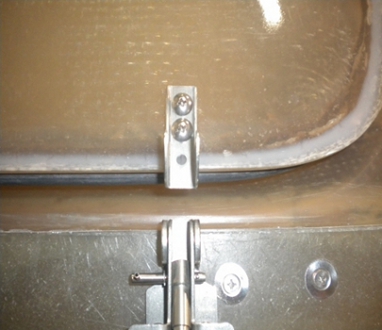
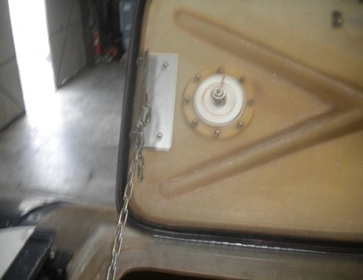
Large door limit chain assembly: (first s/s plate will be installed on door already) clamp 2nd s/s plate inside hopper door opening in center, drill 4- 3/16" holes and countersink, seal with a little silicone. Set 4 #10 screw provided. Bolt chain to door and opening to limit door from opening too far.
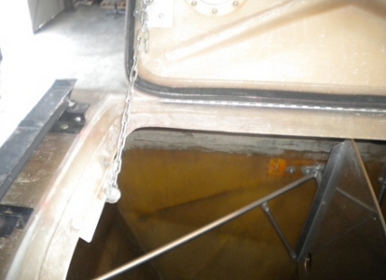
Bolt in instructions: fit same, no glass work, grind or sand only 2½" around cutout inside, drill 3/16" holes at 2" centers, countersink hopper top, silicone frame, and clamp in place, set with #10 countersink screws. Transition hopper to frame; sand or grind to smooth transition (can be filled with silicone to smooth transition desired).
Door set and adjustment are the same as above. Enjoy your new rugged hopper door that seals. You can call us if you have any questions.


